Explanation#
- This article will focus on analyzing the Context mechanism within React, divided into three small stages:
- createContext
- context.Provider
- useContext
- The demo is based on the official example
  const themes = {
    light: {
      foreground: "#000000",
      background: "#eeeeee"
    },
    dark: {
      foreground: "#ffffff",
      background: "#222222"
    }
  };

  const ThemeContext = React.createContext(themes.light);

  function App() {
    return (
      <ThemeContext.Provider value={themes.dark}>
        <Toolbar />
      </ThemeContext.Provider>
    );
  }

  function Toolbar(props) {
    return (
      <div>
        <ThemedButton />
      </div>
    );
  }

  function ThemedButton() {
    const theme = useContext(ThemeContext);
    return (
      <button style={{ background: theme.background, color: theme.foreground }}>
        I am styled by theme context!
      </button>
    );
  }
createContext#
Directly set a breakpoint on createContext,
export function createContext<T>(defaultValue: T): ReactContext<T> {
/**
* Declares a context
*/
const context: ReactContext<T> = {
$$typeof: REACT_CONTEXT_TYPE,
_currentValue: defaultValue,
_currentValue2: defaultValue,
_threadCount: 0,
// These are circular
Provider: (null: any),
Consumer: (null: any),
// Add these to use same hidden class in VM as ServerContext
_defaultValue: (null: any),
_globalName: (null: any),
};
/**
* beginWork creates fiber and processes based on $$typeof
*/
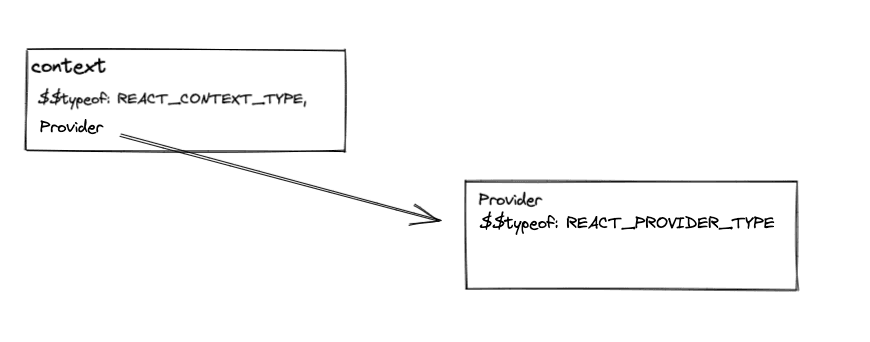
context.Provider = {
$$typeof: REACT_PROVIDER_TYPE,
_context: context,
};
let hasWarnedAboutUsingNestedContextConsumers = false;
let hasWarnedAboutUsingConsumerProvider = false;
let hasWarnedAboutDisplayNameOnConsumer = false;
context.Consumer = context;
return context;
}
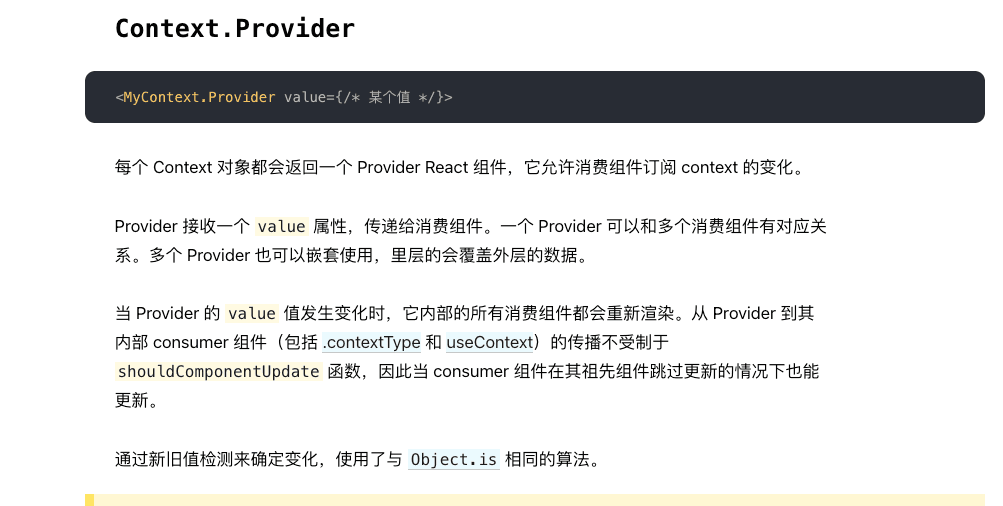
There isn't much here; it mainly declares a context object and attaches the Provider property to it.
Next, let's see how the provider is handled.
context.Provider#
Carefully look at where the Provider is used in the demo; it can be found that it is used in the program in a JSX manner.
So the debugging approach is also clear: observe the place where fiber is generated in beginWork.
Setting a breakpoint on App's return will enter the following call stack.
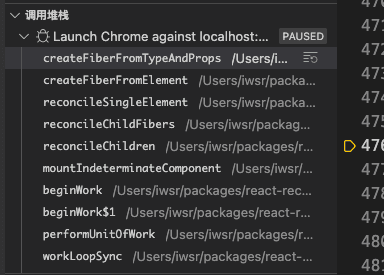
In createFiberFromTypeAndProps, ContextProvider is first assigned to fiberTag to indicate that I need to create a fiber node specifically for Provider, then it enters createFiber, and subsequently returns a fiber node of type ContextProvider.
It is important to note that we are still within App's beginWork; if we need to observe ContextProvider, we need to enter the next beginWork.

This is where ContextProvider is formally processed.
function updateContextProvider(
current: Fiber | null,
workInProgress: Fiber,
renderLanes: Lanes,
) {
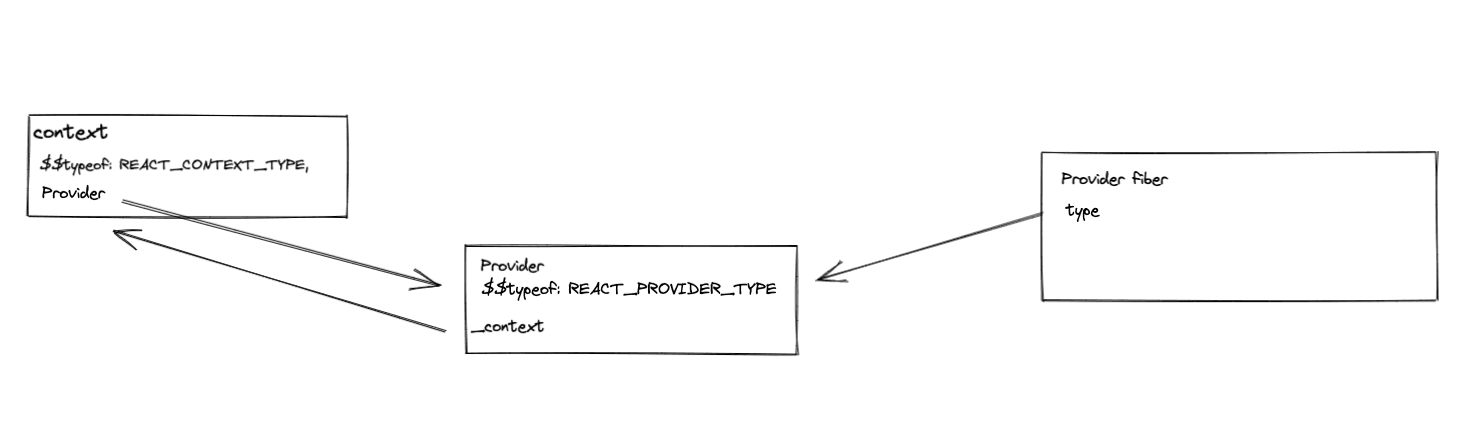
const providerType: ReactProviderType<any> = workInProgress.type;
// The context object created by createContext
const context: ReactContext<any> = providerType._context;
const newProps = workInProgress.pendingProps;
const oldProps = workInProgress.memoizedProps;
const newValue = newProps.value;
// Here the context's _currentValue is modified to the new value
pushProvider(workInProgress, context, newValue);
if (oldProps !== null) {
const oldValue = oldProps.value;
// The provider compares whether the value has changed
if (is(oldValue, newValue)) {
// No change. Bailout early if children are the same.
// If there is no change and children are not updated, reuse the original fiber and exit
if (
oldProps.children === newProps.children &&
!hasLegacyContextChanged()
) {
return bailoutOnAlreadyFinishedWork(
current,
workInProgress,
renderLanes,
);
}
} else {
// If the values are different, update all consumers
// This will not be expanded here, but will be introduced when discussing useContext
// The context value changed. Search for matching consumers and schedule
// them to update.
propagateContextChange(workInProgress, context, renderLanes);
}
}
// Continue creating the provider's child nodes
const newChildren = newProps.children;
reconcileChildren(current, workInProgress, newChildren, renderLanes);
return workInProgress.child;
}
The idea behind updateContextProvider is also quite simple: after modifying the context's value, it compares the new and old values. If they are equal, it reuses the fiber node; if not, it creates a new fiber node. The only point to note is propagateContextChange, which we will discuss together with useContext.
useContext#
Fortunately, this hook does not need to be discussed in terms of mount and update. It also does not generate a hook object.
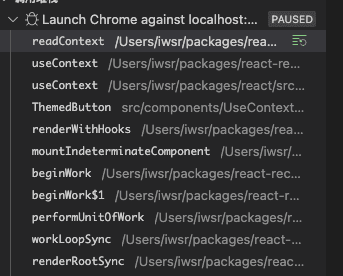
Let's directly see what readContext does.
Because using this hook requires passing in the corresponding context object.
const theme = useContext(ThemeContext);
export function readContext<T>(context: ReactContext<T>): T {
  /**
   * Gets the value passed in the context
   * */
  const value = isPrimaryRenderer
    ? context._currentValue
    : context._currentValue2;

  if (lastFullyObservedContext === context) {
    // Nothing to do. We already observe everything in this context.
  } else {
    // Creates a contextItem, which will later be linked as a list on the currently rendering fiber node
    const contextItem = {
      context: ((context: any): ReactContext<mixed>),
      memoizedValue: value,
      next: null,
    };

    if (lastContextDependency === null) {
      // Create a list and mount it on the fiber node
      // This is the first dependency for this component. Create a new list.
      lastContextDependency = contextItem;
      currentlyRenderingFiber.dependencies = {
        lanes: NoLanes,
        firstContext: contextItem,
      };
      if (enableLazyContextPropagation) {
        currentlyRenderingFiber.flags |= NeedsPropagation;
      }
    } else {
      // Append a new context item.
      // Add an element to the context item list on the fiber
      lastContextDependency = lastContextDependency.next = contextItem;
    }
  }
  // Return the value
  return value;
}
At this point, the structure is roughly like this.
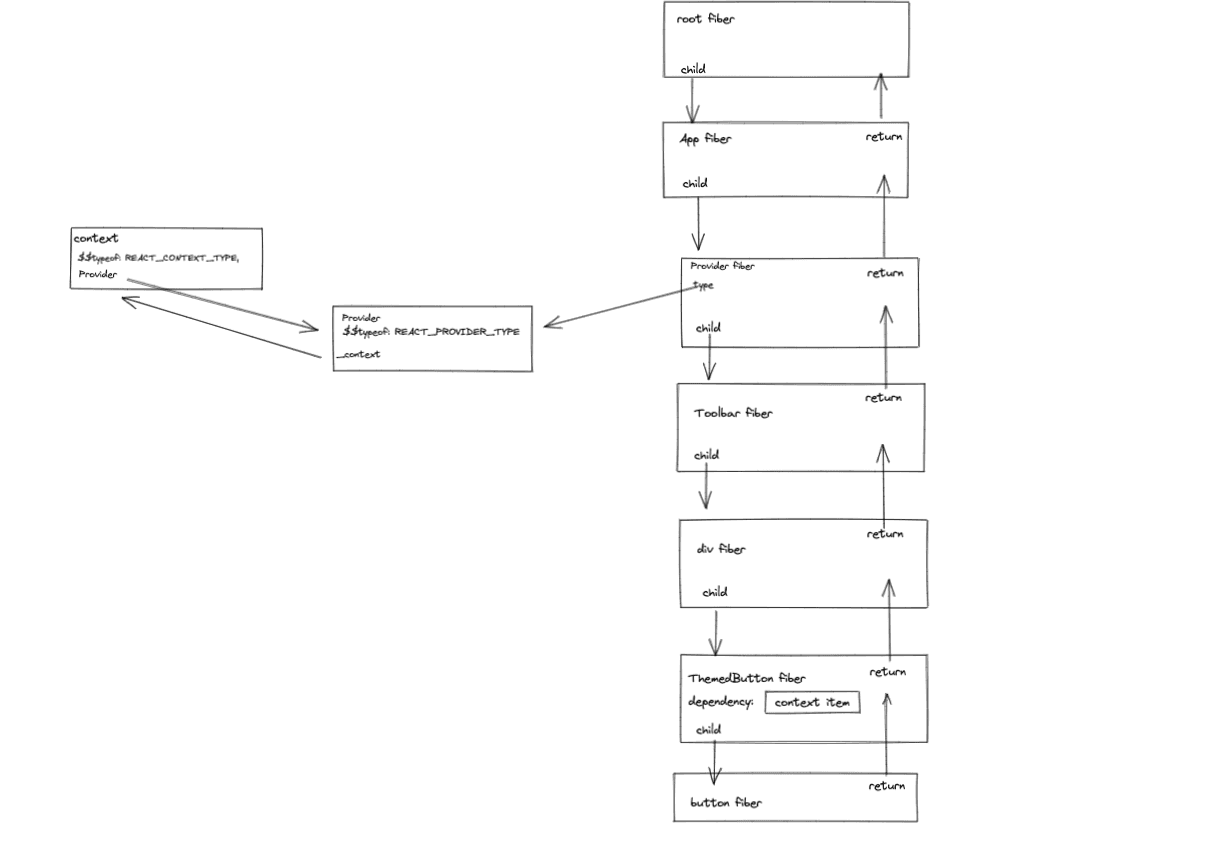
readContext mainly reads the value passed in the context, but why does it need to add a linked list related to the context on the currently rendering fiber node?
This is when we need to look back at propagateContextChange.
  function propagateContextChange_eager(workInProgress, context, renderLanes) {

    var fiber = workInProgress.child;

    if (fiber !== null) {
      // Set the return pointer of the child to the work-in-progress fiber.
      // Bind the parent to the child node
      fiber.return = workInProgress;
    }

    while (fiber !== null) {
      var nextFiber = void 0; // Visit this fiber.
      /**
       * The dependencies on the fiber node are treated as an internal identifier for using context
      */
      var list = fiber.dependencies;

      if (list !== null) {
        // This is a scenario where context is used
        nextFiber = fiber.child;
        var dependency = list.firstContext;

        /**
         * Here, we traverse the context item linked list to confirm whether the current provider's bound context object exists
        */
        while (dependency !== null) {
          // Check if the context matches.
          if (dependency.context === context) {
            // Found the context object marked by the current provider
            // Match! Schedule an update on this fiber.
            if (fiber.tag === ClassComponent) {
              ...
            }
            // Mark the current fiber with an update flag
            fiber.lanes = mergeLanes(fiber.lanes, renderLanes);
            var alternate = fiber.alternate;
            // Similarly, mark the corresponding current node of the current WIP with the same flag to prevent losing information due to higher priority tasks
            if (alternate !== null) {
              alternate.lanes = mergeLanes(alternate.lanes, renderLanes);
            }
            /**
             * This operation has been mentioned multiple times in other articles (e.g., useState)
             * It simulates generating an update for renderlanes
             * Marks the updates from the current node all the way up to the root node.
             * Thus, they are updated together during scheduling
            */
            scheduleContextWorkOnParentPath(fiber.return, renderLanes, workInProgress); // Mark the updated lanes on the list, too.

            list.lanes = mergeLanes(list.lanes, renderLanes); // Since we already found a match, we can stop traversing the
            // dependency list.

            break;
          }

          dependency = dependency.next;
        }

      } else if (fiber.tag === ContextProvider) {
        ...
      } else if (fiber.tag === DehydratedFragment) {
        ...
      } else {
        ...
      }

      ...
      }

      fiber = nextFiber;
    }
  }
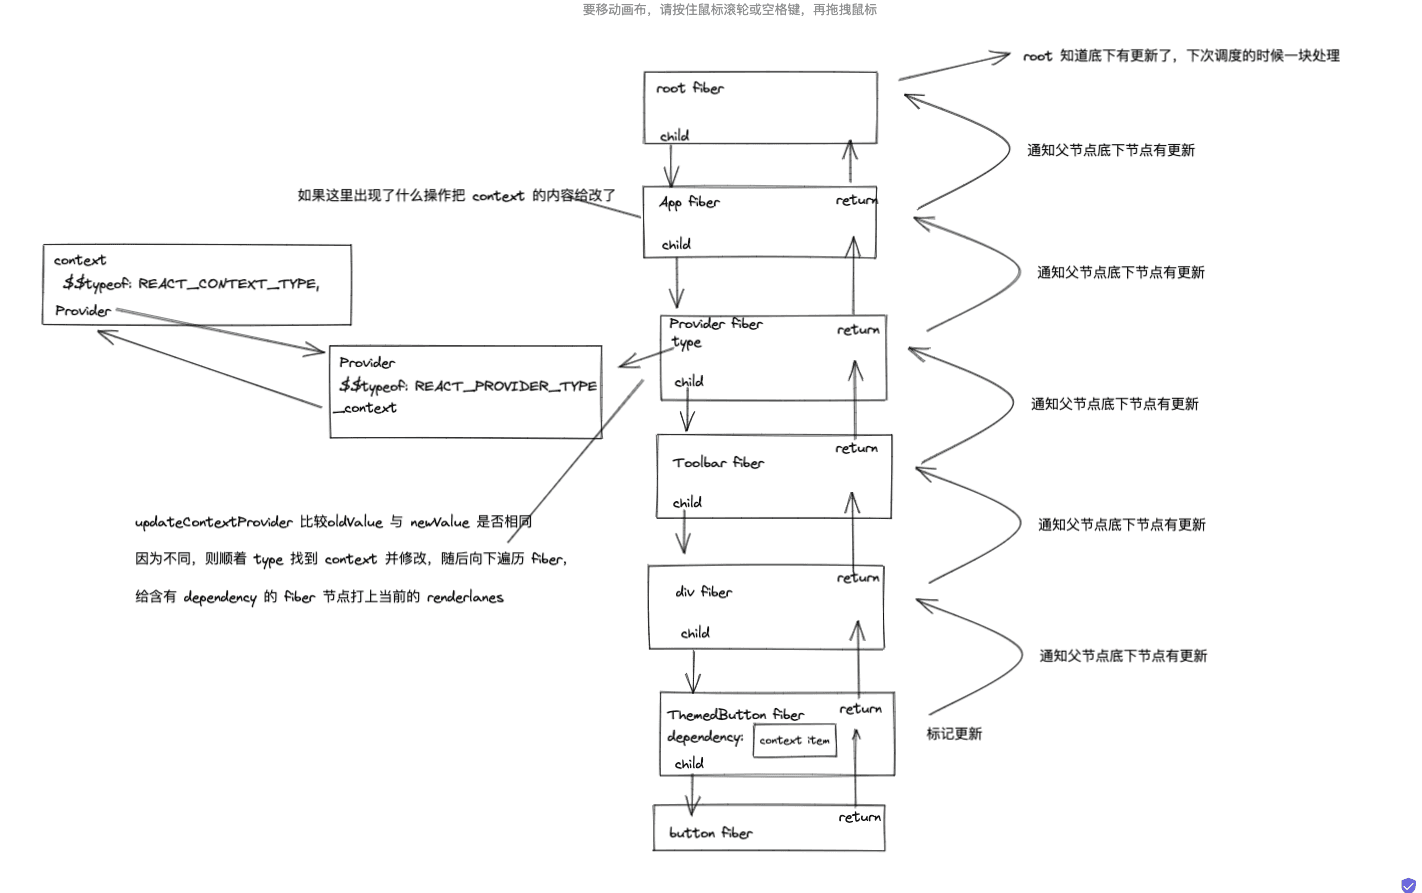
To summarize, each fiber node that uses the context object will be marked with a dependencies linked list property. Once the value on the provider changes, it will traverse all its child nodes to see if they have the dependencies mark and give them an update mark to achieve a forced update. Just as mentioned in the documentation.