說明#
- 本文重點將會分析 React 內的 Context 機制,分為三個小階段
- createContext
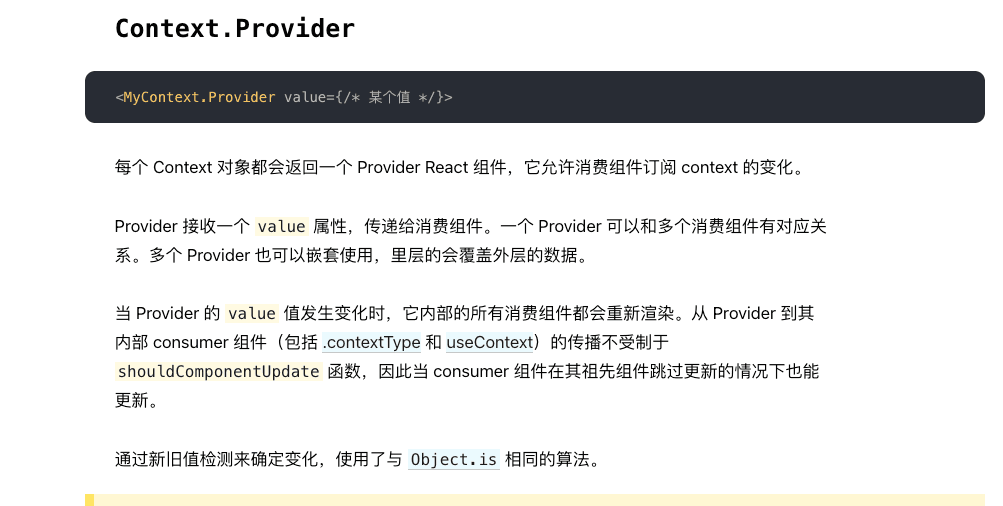
- context.Provider
- useContext
- demo 基於官方例子
  const themes = {
    light: {
      foreground: "#000000",
      background: "#eeeeee"
    },
    dark: {
      foreground: "#ffffff",
      background: "#222222"
    }
  };

  const ThemeContext = React.createContext(themes.light);

  function App() {
    return (
      <ThemeContext.Provider value={themes.dark}>
        <Toolbar />
      </ThemeContext.Provider>
    );
  }

  function Toolbar(props) {
    return (
      <div>
        <ThemedButton />
      </div>
    );
  }

  function ThemedButton() {
    const theme = useContext(ThemeContext);
    return (
      <button style={{ background: theme.background, color: theme.foreground }}>
        我是由主題上下文樣式化的!
      </button>
    );
  }
createContext#
直接對 createContext 打上斷點,
  export function createContext<T>(defaultValue: T): ReactContext<T> {
  /**
   * 聲明了一個 context
  */
  const context: ReactContext<T> = {
    $$typeof: REACT_CONTEXT_TYPE,

    _currentValue: defaultValue,
    _currentValue2: defaultValue,

    _threadCount: 0,
    // These are circular
    Provider: (null: any),
    Consumer: (null: any),

    // Add these to use same hidden class in VM as ServerContext
    _defaultValue: (null: any),
    _globalName: (null: any),
  };

  /**
   * beginWork 創建 fiber 時會根據 $$typeof 來分別處理
  */
  context.Provider = {
    $$typeof: REACT_PROVIDER_TYPE,
    _context: context,
  };

  let hasWarnedAboutUsingNestedContextConsumers = false;
  let hasWarnedAboutUsingConsumerProvider = false;
  let hasWarnedAboutDisplayNameOnConsumer = false;

  context.Consumer = context;

  return context;
}
東西不多,內部主要是聲明了一個 context 對象,並在上面掛上了 Provider 的屬性。
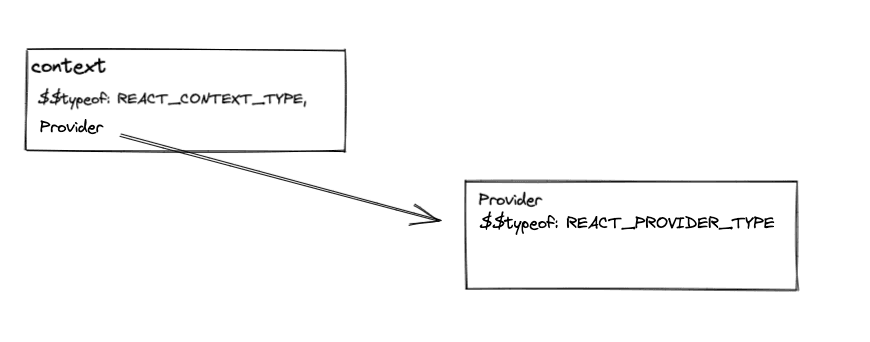
接下來看看 provider 裡面是怎麼處理的
context.Provider#
仔細看 demo 裡面用到 Provider 的地方,能發現它是被以 jsx 的方式使用到程序內的。
那麼調試的思路也很明顯了,去觀察 beginWork 內生成 fiber 的地方
對 App 的 return 打點,會進入以下調用棧
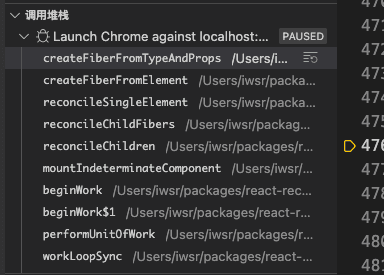
在 createFiberFromTypeAndProps 內會先將 ContextProvider 賦值給 fiberTag,以表示我需要創建一個 Provider 特供的 fiber 節點,然後進入 createFiber,隨後便返回了一個 type 為 ContextProvider 的 fiber 節點。

需要注意的是此時我們還在 App 的 beginWork 內,如果需要觀察 ContextProvider 的,需要進入下一次 beginWork。

這裡才是正式處理 ContextProvider 的地方。
function updateContextProvider(
  current: Fiber | null,
  workInProgress: Fiber,
  renderLanes: Lanes,
) {
  const providerType: ReactProviderType<any> = workInProgress.type;
  // createContext 創建的 context 對象
  const context: ReactContext<any> = providerType._context;

  const newProps = workInProgress.pendingProps;
  const oldProps = workInProgress.memoizedProps;

  const newValue = newProps.value;

  // 這裡修改了 context 的 _currentValue為新值
  pushProvider(workInProgress, context, newValue);

  if (oldProps !== null) {
    const oldValue = oldProps.value;
    // provider 比較 value前後是否發生變化
    if (is(oldValue, newValue)) {
      // No change. Bailout early if children are the same.
      // 沒有改變的話,並且 children 未更新就復用原來的 fiber 然後退出
      if (
        oldProps.children === newProps.children &&
        !hasLegacyContextChanged()
      ) {
        return bailoutOnAlreadyFinishedWork(
          current,
          workInProgress,
          renderLanes,
        );
      }
    } else {
      // 如果前後 value 不同,那麼就更新所有 consumers
      // 這裡暫時先不展開,等到 useContext 時再介紹
      // The context value changed. Search for matching consumers and schedule
      // them to update.
      propagateContextChange(workInProgress, context, renderLanes);
    }
  }

  // 繼續創建 provider 的子節點
  const newChildren = newProps.children;
  reconcileChildren(current, workInProgress, newChildren, renderLanes);
  return workInProgress.child;
}
updateContextProvider 的思路也比較簡單,修改 context 內的 value 後比較新舊值是否相等,相等就復用 fiber 節點,不相等就重新創建新的 fiber 節點。唯獨需要注意的地方是 propagateContextChange。這個我們會結合 useContext 一塊講。
useContext#
令人高興的是,這個 hook 並不需要分 mount 與 update 來講。並且也不會生成 hook 對象。
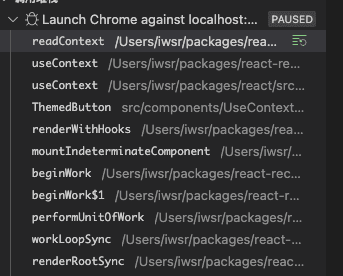
我們直接來看 readContext 裡面做了什麼就行了。
因為使用這個 hook 時需要傳入對應的 context 對象
const theme = useContext(ThemeContext);
export function readContext<T>(context: ReactContext<T>): T {
  /**
   * 獲取 context 傳入的 value
   * */
  const value = isPrimaryRenderer
    ? context._currentValue
    : context._currentValue2;

  if (lastFullyObservedContext === context) {
    // Nothing to do. We already observe everything in this context.
  } else {
    // 創建了一個 contextItem,後面會穿成鏈表掛在目前正在渲染的 fiber 節點上
    const contextItem = {
      context: ((context: any): ReactContext<mixed>),
      memoizedValue: value,
      next: null,
    };

    if (lastContextDependency === null) {
      // 創建鏈表,並掛載在 fiber 節點上
      // This is the first dependency for this component. Create a new list.
      lastContextDependency = contextItem;
      currentlyRenderingFiber.dependencies = {
        lanes: NoLanes,
        firstContext: contextItem,
      };
      if (enableLazyContextPropagation) {
        currentlyRenderingFiber.flags |= NeedsPropagation;
      }
    } else {
      // Append a new context item.
      // 在 fiber 上的 context item 鏈表上加元素
      lastContextDependency = lastContextDependency.next = contextItem;
    }
  }
  // 把值丟出去
  return value;
}
此時大致上就是這麼個結構了
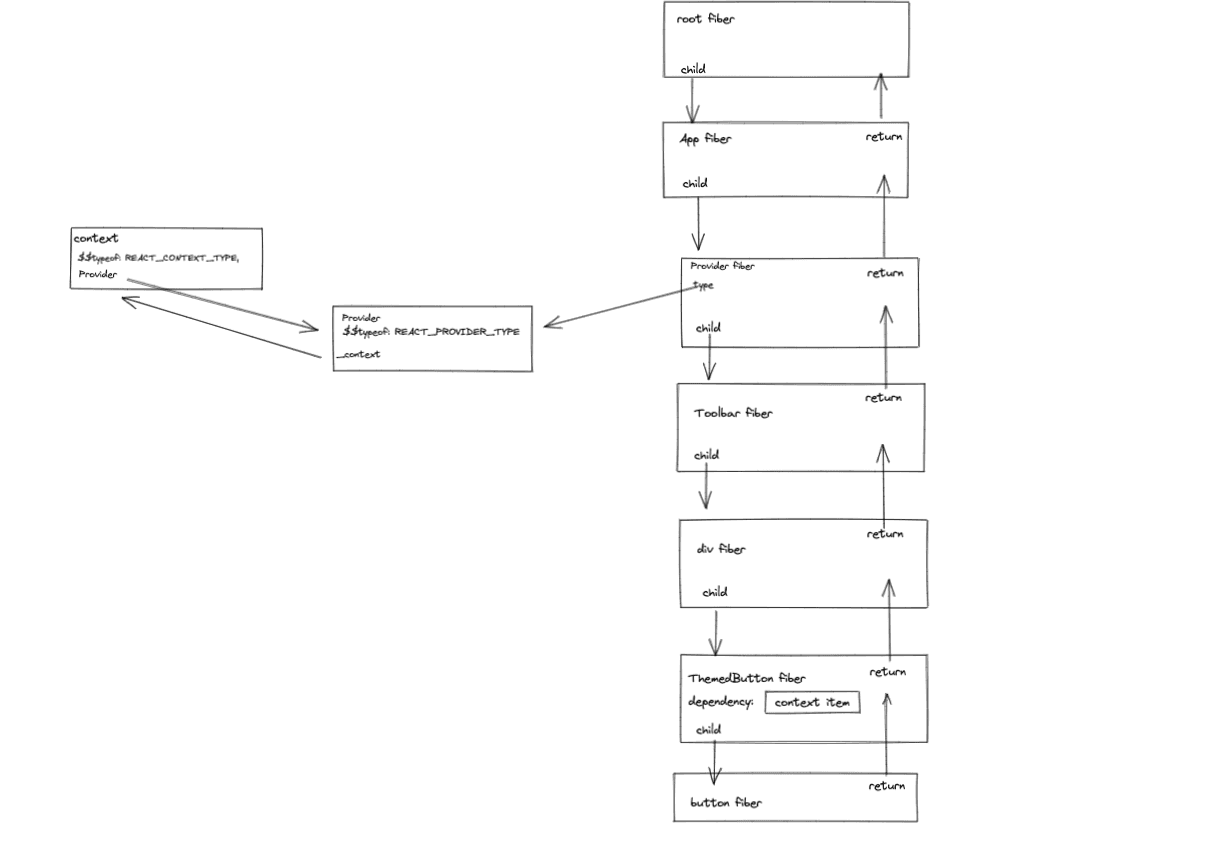
readContext 主要做的還是讀取傳入 context 內的值,但是為什麼要在當前渲染的 fiber 節點上增加一個與 context 相關的鏈表呢?
這時需要回過頭看看 propagateContextChange 了
  function propagateContextChange_eager(workInProgress, context, renderLanes) {

    var fiber = workInProgress.child;

    if (fiber !== null) {
      // Set the return pointer of the child to the work-in-progress fiber.
      // 給子節點綁定 父節點
      fiber.return = workInProgress;
    }

    while (fiber !== null) {
      var nextFiber = void 0; // Visit this fiber.
      /**
       * fiber 節點上的 dependencies 在這裡被視為了內部存在使用了 context 的標識
      */
      var list = fiber.dependencies;

      if (list !== null) {
        // 這裡是有使用到 context 的場景
        nextFiber = fiber.child;
        var dependency = list.firstContext;

        /**
         * 這裡通過 while 遍歷 context item 的鏈表確認是否存在當前 provider 上綁定的context 對象
        */
        while (dependency !== null) {
          // Check if the context matches.
          if (dependency.context === context) {
            // 找到了有使用到當前 provider 上標記的 context 對象
            // Match! Schedule an update on this fiber.
            if (fiber.tag === ClassComponent) {
              ...
            }
            // 給當前 fiber 標記上更新標識
            fiber.lanes = mergeLanes(fiber.lanes, renderLanes);
            var alternate = fiber.alternate;
            // 同樣也需要給當前 WIP 對應的 current 節點也打上相同的標記,防止被更高優先級任務插隊後丟失信息
            if (alternate !== null) {
              alternate.lanes = mergeLanes(alternate.lanes, renderLanes);
            }
            /**
             * 這裡在別的文章裡也多次提到過類似的操作(比如 useState)
             * 其實就是模擬了生成了一個 renderlanes 的 update
             * 將更新從當前節點一直向上標記,直到 root 節點。
             * 從而在調度時一起更新
            */
            scheduleContextWorkOnParentPath(fiber.return, renderLanes, workInProgress); // Mark the updated lanes on the list, too.

            list.lanes = mergeLanes(list.lanes, renderLanes); // Since we already found a match, we can stop traversing the
            // dependency list.

            break;
          }

          dependency = dependency.next;
        }

      } else if (fiber.tag === ContextProvider) {
        ...
      } else if (fiber.tag === DehydratedFragment) {
        ...
      } else {
        ...
      }

      ...
      }

      fiber = nextFiber;
    }
  }
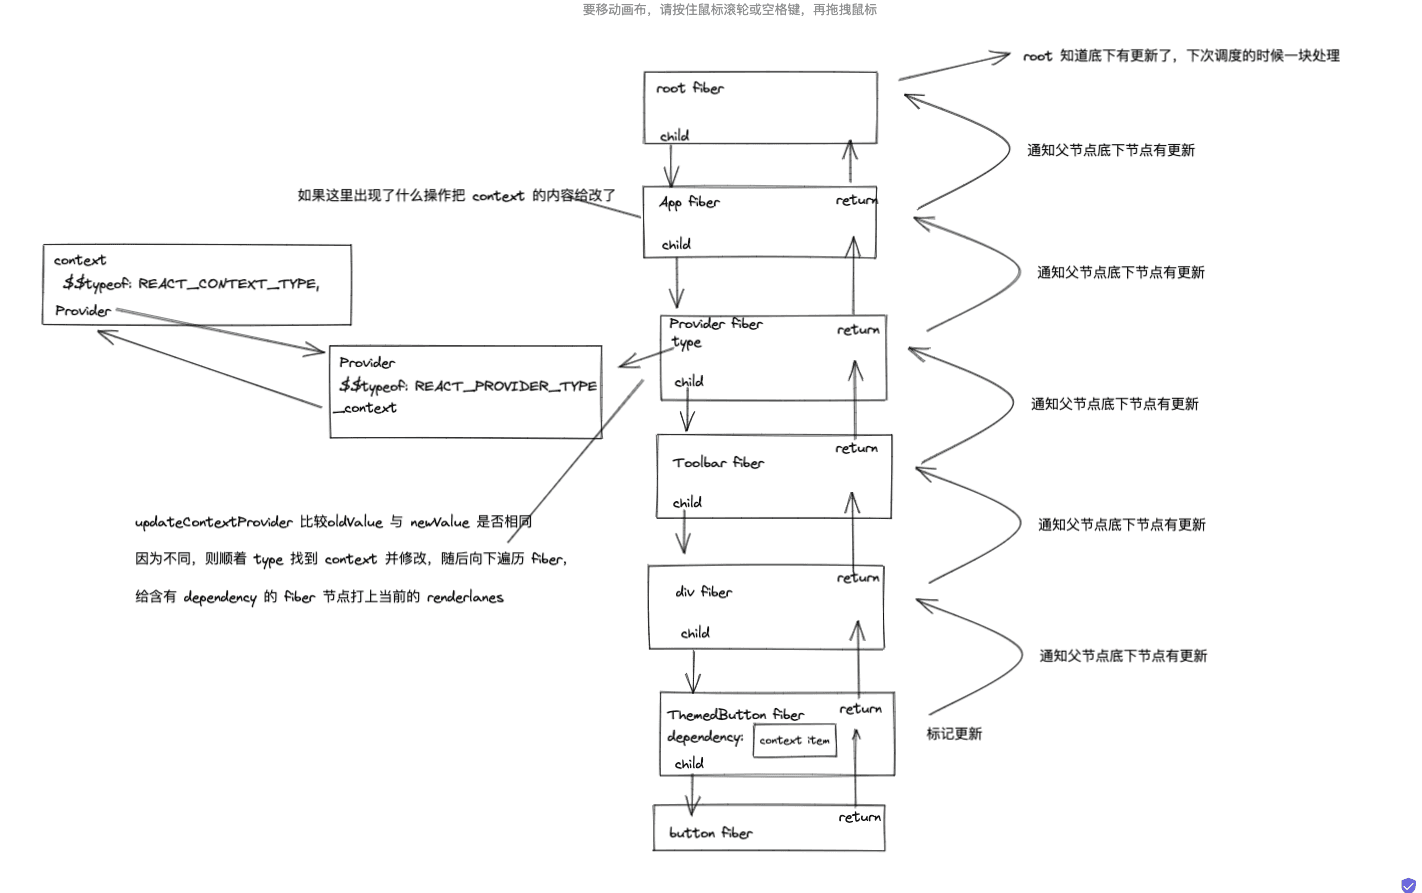
大致總結一下便是,每一個使用到了 context 對象的 fiber 節點都會被打上 dependencies 的鏈表屬性,一旦 provider 上的 value 發生改變,它就會遍歷自己的所有子節點是否擁有 dependencies 的標記,並給他們打上更新標記從而實現強制更新。就像文檔裡說的一樣。
